5 Lightroom Tips You Should Know

Lightroom is a phenomenal program with just the sheer amount of editing and detailed organization options that are available. The issue that can arise for beginners, and even experts, is having to discover Lightroom's capabilities among the incredible number of options and sliders. With that in mind, here are five features I discovered that helped considerably when I was learning Lightroom.

?

1. Copy and paste edits

If you have a group of photos that need similar edits, don’t recreate everything by scratch, just copy and paste. It's so much easier and saves you a lot of time. In the thumbnail bar at the bottom of the Develop tab, right click the photo from which you'd like to copy your editing options. Highlight “Develop Settings” and click “Copy Settings”.

The pop-up box allows you to choose exactly which settings to copy, click “Copy” at the bottom right.

Right click the photo(s) you’d like to copy the settings to, highlight “Develop Settings” and then click “Paste Settings”.

2. Lens corrections

All camera lenses slightly distort a captured image because of the way lenses work. This is seen in the example photo below, where there is slight bulging in the center of the image, as well as a bit of vignetting (darkening of the corners of the image). Lightroom has a library of lens profiles for almost every lens specific distortion and is able to fix it with just a click.

On the Develop tab, scroll the right sidebar to “Lens Corrections” and click the black bar to open it.

Next, click “Enable Profile Corrections”. Generally Lightroom will automatically pick the correct profile based on the photo’s metadata. If it cannot, simply specify the “Make”, or manufacturer like Nikon or Canon, and the actual lens. Below is the same example image after applying the corrections. Notice the stark difference.

3. Ratings and ordering

There are many organization systems for the Library tab in Lightroom. One is the rating, 1-5 stars, which allows you to keep track of photos you like, and allows you to organize the library according to your ratings. From either the Library tab or the Develop tab, you can use the numbers 1-5 on the keyboard to mark any highlighted photo — or photos — a one to five star rating, hitting 0 on the keyboard will reset the rating to zero.

To organize the photos by rating, go to the Library tab and look for the grey bar between the tiled photos and the thumbnail bar at the bottom. You should see “Sort:”, click besides it and choose “Rating”.

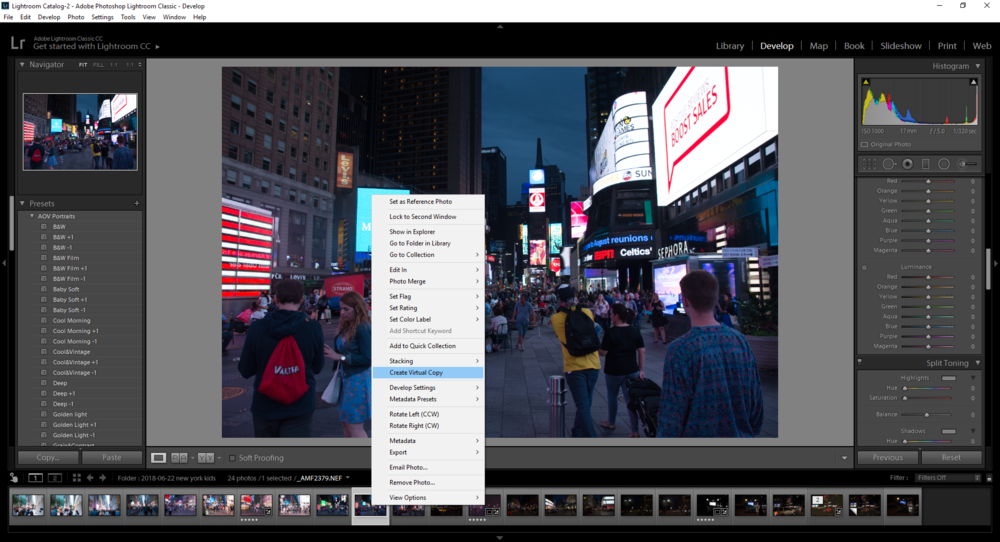
4. Create a virtual copy

Lightroom is unique in that your edits do not directly affect the photo (as they do in Photoshop). Instead, they are saved separately in the Catalog and the original file remains untouched. Because of this, we can create a Virtual Copy of the photo and then create multiple edited versions.

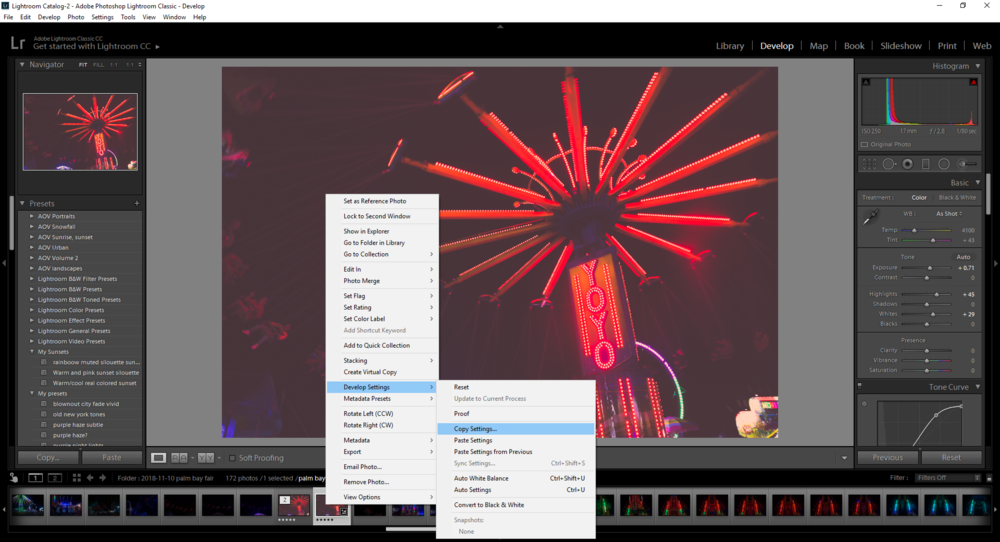
Under the Develop tab, right click the photo in the bottom photo bar you wish to copy and click “Create Virtual Copy”. Now it appears beside the original image and it is now labeled “2 of 2”.

5. Perfect white balance

When a photo is too blue, or too yellow, or even too green or pink, it is a white balance issue. Lightroom can fix this easily. Just pick an area in the photo that is a neutral color as this will be the reference point to balance everything else.

In the Develop tab, click the small dropper image at the scrolled top of the sidebar.

Using the dropper, click a pixel that is as neutral grey, brown or white that you can find and Lightroom will adjust the temperature and tint to match.

Concluding Thoughts

While some of these features may be obvious to those familiar with the program, other features — like copying and pasting edits — took me almost a year to discover. If you can think of a convenient feature, it’s probably already in Lightroom. Just explore and experiment with all of the available options--you’ll soon improve your skills and become a better photographer before you know it.


Join Now for FREE

No credit card required

Get Started
© Lightfolio 2024